What are suicide doors?
Suicide doors are doors that open in the reverse direction. Why are they called "suicide" doors? In the old days, these doors were prone to open in a crash, and, since most vehicles did not have seatbelts, the driver and any passengers could be ejected out of the car in an accident. So driving a car this dangerous was said to be "suicidal."
Also, you didn't have to be driving to be killed by the "suicide doors". If you are parked alongside the road and start to climb in or out of the car you better make absolutely sure that no vehicles are approaching. If you open a normal car door into traffic it will be ripped off the vehicle. However, if you have suicide doors and open the door into traffic it will be violently slammed shut. If you happened to be climbing in our out of the vehicle at the time, you would more than likely be crushed and killed instantly.
Therefore, anybody crazy enough to own a vehicle with these doors would have to be suicidal.
And that's how the term "suicide doors" originated.

First and foremost:
- Wires for door controls, power mirrors, and speakers will need to be extended by at least a few feet. This is because the wiring will have to come out of the rear of the door and then routed through the body of the car until they can be reconnected. If you are not comfortable with cutting thesewires and extending them, you will need the assistance of someone who will do it for you . I'm sure that you know someone that's an electrician or someone that can install stereo systems.
- Will you void the warranty on your vehicle if you rip the doors off and apply this modification? You should check first if this is a concern for you.
- Will your vehicle pass inspection in your state or local area with extremely modified doors?
- Also, is it feasible for your vehicle? Suicide doors can probably be engineered for any vehicle, but will it be difficult for you or your passengers to get in and out of the vehicle? It all depends on your particular application.
Installing suicide doors on your vehicle
Despite what you may believe, suicide doors are not that difficult to install. There are plenty of body shops out there that will charge you $3,000-$5,000+
for this modification, but that is a ridiculous price to pay for what you are really getting. Yes, it looks like an extreme mod, and it does require a lot of hard
work, trial and error, and patience. However, the only parts that you will need can be obtained for less than $700.
The toughest part of this project will be welding. If you have cutting and welding tools, you should have no trouble at all.
Parts List
Obtaining the parts for this modification is not a problem. A custom truck enthusiast in Indiana manufactures quality suicide door kits that will work on just about any vehicle. His name is Jason Thorbecke, and he currently runs SuicideDoors.com. Jason converted his 2000 S-10 to suicide doors and he documented the entire process.
Since then, he has been developing and improving a universal suicide door kit of his own design. The quality of his kit is unheard of, and the price is an absolute steal.
Jason sells the complete suicide door kit for $399.99. If you only need the hinges, you can acquire them from Jason for only $329.99.
The complete kit consists of the following:
- Heavy duty, flex-free hinges, and hinge hardware
- Door and jamb pockets
- Bear Claw latches and strikers
- Install plates for the latches and strikers
- Hidden dome light switches
- Instructions

(Above is a picture of the complete kit.)

(Above is a picture of the door hinge system.)

(Above is a picture of the Bear Claw latches and strikers. These are the toughest and most reliable door latches that you can find. These will keep your door latched shut, and they will pop the door open when activated. The latches mount to the end of the door, and the striker pins mount to the inner door jamb on the vehicle. The Bear Claw latch "grabs" the striker pin when the doors are closed. When the Bear Claw latch is activated by the door handle or a remote door opener button, the door is popped from the striker and opens enough for you to open the door and get in.)

(Above is a picture of the install plates for the Bear Claw latches and the strikers.)
NOTE: In order for you to be able to open your door with the factory door handle, you will need to engineer some type of lever from your door handle to the Bear Claw latch. This is impossible for me to cover in detail because of the many different ways that car door handle systems operate. This can be as simple as welding a rod from the handle to the Bear Claw release lever.
An even better solution to this problem is to shave your door handles. (They're going to be on the wrong end of the door anyways!) Since you are getting rid of the door handles, you can simply install an electric solenoid to activate the Bear Claw latch. The beauty of this is that your vehicle will be very streamlined and appear very customized without door handles. You will also have a remote door popper on your key ring that will open your suicidal door for you! Talk about getting attention! This is the preferred solution, and this will be the method that I discuss.
Installing the Hinge Pockets

The hinge pockets are the rectangular pieces of metal that the hinge's arm rotates back into when the door is shut.
I've circled the hinge pocket in the picture above. Above, the hinge arm is extended 90 degrees. The position of the hinge above is the position it will be in when your suicide door is open 90 degrees (straight out from the vehicle).
Remove the pin on the hinge, and the arm will separate from the hinge pocket. Do this to two of the hinges as each door requires 2 hinges.
For your door to be as sturdy as possible, you will want to mount the two hinges on each door as far apart from each other as you possibly can.
The hinge pockets will mount in the door jamb of your vehicle. First, remove your door latching mechanisms from the door jamb. (Not the door itself) This will probably just be a striker pin, but some vehicles may have a different latching system.
You now need to determine where to make the cut-outs for the hinge pockets. Remember that you need to space them as far apart as possible so that there will be very little flex. So look at your door jamb and try to determine where you will make the cut-outs. Also, since the position of the hinge pockets dictate the positions on the door where the the hinges will attach, you need to give that some thought as well. Don't cut out two large holes in the door jamb, mount the hinges, and then realize that you won't be able to mount the hinge to the door at that position. (Could be due to the door design, window motor on the inside of the door, etc) So before you start cutting, be sure to remove the inner door panel and scope out the inside of the door. Make sure that the hinge arm can be inserted into the end of the door at the position of each hinge pocket. To help you make sense of what I'm talking about, I've included a couple pictures below of how the hinge system will be installed.

Now that you can clearly see how the hinges will be installed, you can begin mounting the hinge pockets. To choose the best location for each hinge pocket, remember these tips:
- You want the hinges to be as far apart from each other as possible to reduce flex.
- You must make sure that you have room behind the door jamb for the entire hinge pocket.
- You must make sure that there is room inside the door for the two hinge arms.
- You want to mount the hinge pockets as close to the outside of the car body as possible.
This allows the pivot point on the hinge pocket to be very close to the outside of the car. This allows the door to swing as far away from the car body as possible. The last thing you want is for the door to swing open and dent your car! Once you've decided on the positions for the hinge pockets, you will need to make absolutely sure that the hinge pockets are installed perfectly in alignment. Otherwise, there will be stress on the pivot points and cause the hinges to wear out. So take the hinge pockets and run a slim, straight rod thru the pivot points on the hinges. The rod ensures that the hinges are in perfect alignment.
Now take this contraption over to your door jamb and place the top hinge in the desired position. Make sure that the hinge's pivot point side is facing the outside of the vehicle. Now take a pencil or sharpie marker and trace the outline of the hinge pocket on the door jamb. Keep holding the top hinge pocket in place and slide the second hinge pocket down the rod to the bottom mounting position. Hold the bottom hinge pocket in place and trace it as well. Mark the rod at the pivot points so that you will know the distance between the two hinge pockets. Now determine if you could slide the two hinge pockets into the door jamb cutouts from the backside if you were to weld a strip of angled metal across the back of the hinge pockets. Hopefully, you will be able to do this. By welding a supporting strip of metal across the hinge pockets on the backside of the door jamb, you will effective strengthen the support of the door tremendously. If for some reason you cannot weld the hinge pockets together and slide them in from the backside of the door jamb, you will especially need to make sure that you cut out the holes to fit as snuggly as possible.
It is now time to cut out the holes in the door jamb.
The hinge pockets mounted in the door jamb are going to be supporting the entire weight of the door. Therefore, the hinge pockets need to be mounted as sturdy as possible. Do NOT cut out a sloppy hole and expect to fill up open areas with a welder. You need to cut the openings as close as possible to the actual size of the hinge pockets. Taking the extra time to do this the right way will pay off in the future. Otherwise you may have a sagging door.
Start by drilling out the corners as shown below:

Then you can use a grinder with a cut off wheel to finish the job:

Remember not to cut too much out. It's better to cut the hole out small and file it down to a perfect fit. Once you get the two cut-outs made, you can slide the hinge pockets (which should be connected by a piece of angled metal) in from the back side. (That is, if you have access to the back side. On some vehicles you may not. If you're one of these unfortunate few, you may have to cut the opening out a little larger to allow the pivot point of the hinge to slide through from the front.) Hopefully they fit nice and snug. Below is a picture of the door jamb cutouts with the hinge pockets in place. Also note the notches on the front of each hinge pocket. These allow the door to be opened a full 90 degrees. When welding the pockets in place, you need to make sure that the backside of each notch is perfectly flush with the door jamb.

Before you weld the hinge pockets in place, go ahead and attach the hinge arms to the hinge pockets with the pins.
Now clamp a chunk of metal to the hinge arms and test the hinge. Swing it back and forth mimicking the motion of a door. If it feels smooth, everything is okay.

Remove the hinge arms and pull the the hinge pockets out of the holes. You now need to strip the paint from the openings prior to welding. Jason recommends using airplane strength paint remover. Just be careful not to get it on any other part of your car! Mask off all surrounding areas before using the paint remover. Otherwise you may end up ruining your paint job.
After you've stripped the paint, place the hinge pockets back into place. Make sure that the notches are flush with the skin of the door jamb and weld them into place. Jason recommends using 0.023 mig wire so that a low enough heat can be used to prevent burning through the skin of the door jamb. He says, "try practicing first."

Installing the Door Pockets
Once the hinge pockets are welded into place, you can go ahead and attach the hinge arms. Once the hinge arms are attached, go ahead and bolt the door pockets to the hinge arms. Once you have done this, close the hinge in the doorway and then gently pull the door together (still on factory hinges) The door will not close all the way because the new hinge assembly is in the way. What you need to do now is take your pencil or marker and mark the positions on the door that need to be cut away for the door pockets to be installed.
The door pockets are installed just like we did the hinge pockets. Remember to the cut the holes for the door pockets as precisely as possible. When you have cut the holes and are prepared to do the welding, be sure to close the door all the way. With the door pockets attached to the hinge arms, you should spot weld the door pockets to the inside of the door. It is very important that you at least spot weld the door pockets to the door while the door is shut in its factory closed position. After you have spot welded the door pockets to the inside of the door, you can unbolt the door pockets from the hinge arms. At this time, you can finally remove the hinge pins for the factory hinge! Do NOT remove the whole hinge though! You will need them later to hold the door in position while you bolt the door back to the new hinges. Finish welding the door pockets to the door, and be sure to do a good job. A lot of weight will be put on them in the future.
Once the door pockets are securely welded in place, you can take the door back to the car and sit it in the doorway resting on the factory hinges. Go ahead and bolt the hinge arms back to the door pockets. Now I'm sure that you're dying to swing the door open and check it out! So go ahead and do it, but be very careful. The inside door skin is very thin and it will flex. So don't worry when you open the door and find that it sags. This is easily fixed by welding cross-members or a piece of sheet metal across the inner door skin.
Rerouting the Electrical Wiring
Since the door will be swinging open on the opposite side, you will have to get rid of the electrical/speaker wires that run into your door along the factory hinges. You will need to cut the wiring and splice in additional wire so that it will reach out the other side of the door. If you don't know how to do this, or if you don't feel comfortable doing this, you should ask a friend with some experience to help you. Or you can go to your local stereo installation shop and ask their advice. They'll be able to tell you what size wire you'll need, and what tools you'll need. They may even do it for you at a cheap price.
What kind of wires go into the door? It depends on the vehicle, but typically there are just speaker wires and door controls. This installation guide covers shaving the door handles. Therefore, electric door locks will be useless.
There is no locking mechanism for shaved door handles. A thief can't open the vehicle without door handles, so what's the point of needing a lock? Therefore, if your door controls are just for locks, you can just remove the wiring and not even worry about them. Leave at least several inches of the original wire hanging from the devices on your door. This way you have room to connect the new wire.
You probably have a speaker in the door that you don't want to disable. You may have a door control that you don't want to disable as well. Just determine the wires that you need to keep and then make plans to extend them.
You can take a 2-3 inch section of each wire that you need to extend to Radio Shack. Use the sections of wire to find the appropriate type and size of wire that you will need to extend them with. Buy a couple feet more than what you think you'll need. It is definitely better to cut some off than have to go buy more when you realize you didn't get enough.
Before you can extend the wires out the other side of the door, you will need to cut an opening for the wires to pass through. Use your cutting tool or a large drill to create a circular opening in the end of the door between your new hinge arms. Next, do the same thing to the door jamb between the new hinge pockets. You now have a path to run your wires out the opposite side of the door and into the vehicle.
Note: Make sure that the openings are very smooth. You don't want the edges to cut into the wiring. You should also use a section of flexible hose to protect the section of wire that runs through the metal openings. This will protect the wires from being frayed. You can also purchase a custom rubber sleeve to hide the wiring and make your installation look even more professional. The following website sells these rubber grommets:
http://www.minorrubber.com.
Now, connect the new wires to the wires still attached to the devices in the door. You can connect them however you like. Wire nuts, special connectors, or solder will work just fine. Just make sure that you tape up the connections so that there is no chance of a short occurring.
You will be routing the extended wires out the other side of the door and through the door jamb. From there, the wires can be ran to the floor of the vehicle and then up to the front of the door hidden under the carpet and/or trim.
The wires that you cut off at the door jamb should still be sticking out of the door jamb opening. Push these wires back through the opening and route them down to meet up with the end of the extended wires that you just routed to the front of the door. Connect the original wires to the matching extended wires using the same method you used earlier.
Double check your connections! Before doing anything else, try to use the devices that you rewired. For example, make sure that you can still control your power windows, etc. If everything works, hide away the wiring under trim and carpet.
Installing the Bear Claw Latches
It is now time to install the new Bear Claw latches!


You'll need to determine where you are going to install the latch on the door. Just position it so that you can mount the striker plate and striker at the same position on the door jamb.
You can go ahead and remove the factory hinges if they are in the way. If they are welded on, you will have to cut them off. Jason ran into this problem on his 2000 S-10. He removed the paint on them with paint stripper so that he could see the burn marks from the spot welds. He then drilled the spot welds out (all 4 of them) and broke the hinge off with a hammer.
In the picture above, you can see the install plates for the latch, the bolts that secure the Bear Claw latch to the install plate, and the striker pin install plates.
Take one of the install plates for the latch and hold it up against the end of your door and determine where you want to place the latch. When you are happy with the position, trace the outline of the install plate onto the door.
Once again you will have to cut out this shape from the metal. Once again you'll need to make sure that you get the size as accurate as possible. Once the shape is cut out, and the install plate fits nice and snug into the opening, you can bolt the Bear Claw latch to the install plate and weld it in place.

Now you need to install the strike pin and plate. To get it lined up perfectly, go ahead and latch the strike pin into the teeth of the latch that you just mounted. Then climb into the vehicle and pull the door together. Mark the position on the door jamb where the center of the strike pin needs to be positioned.
Now, cut out the door jamb just like you did for the hinge pockets, door pockets, and the latch plate. If you don't have enough room for the entire striker plate, you can cut the plate down to whatever size you need. Then make the appropriate cut-out and barely spot weld the striker plate in the door jamb. Go ahead and attach the striker pin to the plate and try closing the door. Make sure that the latch is aligned with the striker pin before you weld the plate in.
Now that you have the latch mechanism installed, you need a way to control it! The latch has a release lever that will pop the door open when pulled. Below, I've circled the latch's release lever:

If you intend to keep your door handles, you will simply need to weld a rod from the door handle rod to the latch's release lever. Due to the shape of the door, you will probably have to create an odd-shaped connecting rod. A better solution would be to use steel cable and perhaps a pulley or two. (Like in the diagram included below.) This way you can connect the outside door handle AND the inside door handle to the latch release via cable. You can attach both the inside and outside door handles to the latch release by welding two separate rods, but there will be an odd side effect. When you lift the inside door handle, the outside door handle will lift, and vice versa. So using a cable is the best method to use both your inside and outside door handles.

However, we want to shave the door handles and use our keychain to open the doors.
Remote Controlling the Doors
Here are the basics of the remote door popper. I won't go into extreme detail with this installation because the different kits come with different parts and different instructions. I recommend purchasing the AutoLoc "35lb Remote Shaved Door Kit" (Part #: SVPRO3). It is $250, but will provide everything you will need for a perfect and reliable shaved door handle installation.

- You'll have a keychain controller for popping open either the driver or passenger door. You can also control 4 doors if you have a 4-door vehicle.
- You get a heavy-duty back up button to install under the vehicle to pop the doors open in the event that your keychain controller ever quits working.
- A solenoid will be mounted inside the door vertically in line with the latch's release lever. A solenoid is a small device that can pull with a large amount of force. You connect a steel cable from the solenoid to the latch release lever. The solenoid can be controlled by the keychain controller. When the solenoid is activated, it will pull the release lever and the Bear Claw latch will pop the door open. The Bear Claw latch requires very little force to work, and the AutoLoc 35lb solenoid will be more than enough to pop the door open immediately every time!
- You get (2) long range remote control units.
- (3) Heavy-duty relays.
- 1/16 Pre-stretched stainless steel cable.
- Brackets and mounting hardware.
The wireless solenoid system is very easy to install, and it comes with very nice instructions. All that you need to know is the basics of how the system works. By knowing the basics, the installation should go very smoothly, or you could even opt to design your own solution for opening the doors.
If you have a very customized car, and have future plans to automatically pop the trunk and/or the gas tank, or if you wish to control some other electronic device, you may want to go with the AutoLoc 16-function remote systems. The range is up to 300ft, and you can control a lot more devices with the controller.
Stiffening up the Door
At this time you need to stiffen up the inside door panel to support the weight of the door. You will need to scope out the inside of the door and determine where everything will be when you put the door back together. You need to weld a 1/8" plate to the inside door panel in order for it to no longer sag. You will need to cut the plate to fit your particular vehicle. Below is how Jason cut the plate to fit his 2000 S-10:

He made a template out of cardboard and transferred the shape to the metal plate. He used a plasma cutter and a grinder to shape the metal. He then used tack welds spaced about an inch apart to secure the metal plate to the inner door frame. (He also used self-tapping sheet metal screws to temporarily hold the plate tightly against the door frame while he welded it.)
Now your door should swing open and closed just as good as the factory setup! (Only in reverse!)
The Finishing Touches
Since your door now opens in reverse, you will probably want to get rid of the ugly old hinge marks, latch holes, and wiring holes that are now visible. To patch wiring holes, you can cut a piece of sheet metal to size and weld it in the hole. To get the size of the hole, you can hold a sheet of paper over it and rub a pencil back and forth. You then have a template to cut out the sheet metal.

To hold the small circular piece of sheet metal in the hole while you weld it in place, tack weld a piece of metal to the middle of it. You can then hold it by this piece while you weld. After you're finished welding, simply break the piece off.

When you have finished welding everything, you will need to grind everything down to where it is fairly smooth.
Use paint stripper to remove the paint from all of the door jambs and areas that need refinished.


Before priming the surface, roughen it up with some course sandpaper or a sanding disk. This will allow the primer to bond to the metal better. You can use your favorite auto body primer to prime the surface. Jason used a Dura-Build primer. If you are not sure what to use, ask someone at the body shop supply warehouse. They'll gladly assist you.
Before spraying primer, be sure to mask off your vehicle! Trust me, overspray sucks!


It may take a couple coats to hide your body work. Just be patient and sand each coat nice and smooth. Use a lower grit sandpaper each time.
You can paint the car yourself, but if you've never done it before, you may be better off taking it to a professional.
They'll know what kind of paint to use and how to match it up perfectly. They'll also do the primer for you if you don't want to mess with it either.
and.....Thats it!!!


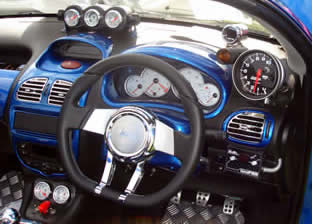 Adding dials and gauges can actually add function as well as form, allowing you to monitor engine oil pressure, temperature, boost, economy, voltages etc... Be sure to only add the dials you will use - less is definitely more otherwise your interior will end up looking like the inside of a 1980's space ship in a B grade movie.
  The standard dials can usually be replaced easily by removing the instrument panel and overlaying a pre-printed panel. White backgrounds are popular and these have the added advantage of being easily seen at night.


